In addition to basic authentication and authorization, Spring Security has support for:
Remember me authentication
Session management
ACL based security
Integration with CAS, LDAP, Open ID
and many other things.
It is not possible to cover all those topics in one article. I plan to write about Spring Security as a series of tutorials. This first installment #1 will get you started with Spring Security and help you setup basic authentication and authorization.
Authentication refers to ensuring that the user is who he or she claims to be. Any application that has any security will typically force the user to present a name and a password. If they match what is stored in the system, we say the user is authenticated and allow the user to continue using the application.
Authorization refers to ensuring that an authenticated user has the necessary permissions to perform some operation or access some data. Authorization involves checking a pre-defined policy which may say that these users have permission to perform these actions on this resource.
For this tutorial, let us take the simple web application we developed in Spring MVC blog and add security to it. Springmvc.zip was renamed to Springsecurityv1 and security metadata added. You can download the sample at Springsecurityv1.zip.
For this tutorial you will also need
(1) Spring 3.0
(2) Spring Security 3.x.
(3) Eclipse is optional. I use eclipse as my IDE. But you can use other IDEs or command line tools as well.
(4) A webserver like Tomcat
(5) Some familiarity with the Spring framework.
Note that Spring Security is packaged separately and is not included in core Spring.
Step 1:
As always, spring configuration begins in applicationcontext config file. We start by adding the namespace which has the spring configuration elements. In springsecurity-servlet.xml, the security namespace http://www.springframework.org/schema/security is added.
<beans xmlns:security="http://www.springframework.org/schema/security"
       xmlns:xsi="http://www.w3.org/2001/XMLSchema-instance"
       xmlns="http://www.springframework.org/schema/beans"
       xsi:schemalocation="http://www.springframework.org/schema/beans
       http://www.springframework.org/schema/beans/spring-beans-2.0.xsd
       http://www.springframework.org/schema/security
       http://www.springframework.org/schema/security/spring-security-3.0.3.xsd">
</beans>
Step 2:
Add the Spring security filters to the web.xml. These filters intercept requests and force authentication and authorization
<filter>
    <filter-name>springSecurityFilterChain</filter-name>
    <filter-class>org.springframework.web.filter.DelegatingFilterProxy</filter-class>
</filter>
<filter-mapping>
    <filter-name>springSecurityFilterChain</filter-name>
    <url-pattern>/*</url-pattern>
</filter-mapping>
Step 3:
Add a minimal Spring security configuration to springsecurity-servlet.xml.
<security:http auto-config="true">
    <security:intercept-url access="ROLE_manager" pattern="/**">
</security:intercept-url>
</security:http>
The http element is the element under which all web application related security configuration. The intercept-url says that for any request to any url ( pattern = "/*") , the user needs to be authenticated and a member of the role ROLE_manager.
When you try to access any URL in this application, Spring will redirect you to a page where you need to enter a username and password. The login page is generated by Spring.
But who are the valid users ? And which of them are part of role ROLE_manager.
Step 4:
A really simple way is to define the users in springsecurity-servlet.xml using the authentication-provider
element.
<security:authentication-manager>
    <security:authentication-provider>
      <security:user-service>
        <security:user authorities="ROLE_manager" name="tony" password="tony12">
        <security:user authorities="" name="raul" password="raul12">
        </security:user>
      </security:user>
    </security:user-service>
  </security:authentication-provider>
</security:authentication-manager>
In this authentication provider, 2 users tony and raul are defined in the configuration. Tony has the authority ROLE_manager.
For a production application, You will want define users, password and roles in database (or LDAP). see step 7 for database configuration.
Step 5:
From eclipse, export the war file (or use the provided war file).
Deploy the war file to tomcat.
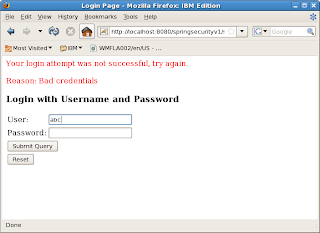
Point your browser to http://localhost:8080/springsecurityv1/test.htm. You will be shown the login screen below.

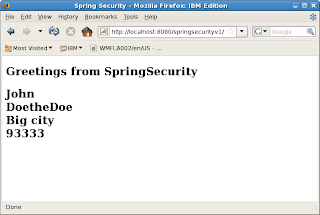
Type in user tony and password tony12. Login will be successful and you will be served the web page below

Step 6:
Restart the browser. Clear cookies and sessions. Type the same URL.
You will be prompted for username/pwd. This time type in abc / abc12. The login will fail as abc is not a valid user.

Repeat with user raul /raul12. With raul the login succeeds. But access will be denied because raul does not have the ROLE_manager authority.
Step 7:
As mentioned earlier, you would normally not keep username/passwords in the spring configuration file. Spring provides the jdbc-user-service that lets you authenticate with users defined in a database.
In this app, springsecurity2-servlet.xml is second configuration that uses jdbc-user-service. The configuration is
<security:authentication-manager>
    <security:authentication-provider>
      <security:jdbc-user-service data-source-ref="securityDataSource"/>
    </security:authentication-provider>
  </security:authentication-manager>

   <bean id="securityDataSource"
       class="org.springframework.jdbc.datasource.DriverManagerDataSource">
       <property name="driverClassName" value="org.apache.derby.jdbc.EmbeddedDriver" />
       <property name="url" value="jdbc:derby:/home/mks/mkprojects/database/springusers" />
   </bean>
For this to work, you need to create database tables required by Spring. See Spring documentation for database table schema.
In summary, getting started with Spring Security is quite easy. In a few simple steps, by adding some configuration metadata, we have enabled authentication and authorization for our web application.