When accessing different applications owned by different organizations, having to authenticate everytime you go from one application to another is annoying. Not only is it time consuming, but you also have to remember multiple passwords, which are often lost.
Single sign on is the ability to authenticate once and be able to move between applications seamlessly using the authenticated identity.
Within an intranet or between applications that are under the control of one development organization, single sign on for web applications can be easily implemented by generating a sessionid and passing it around using cookies. However, such a solution is proprietary and will not work if you need to leave the intranet and access other applications on the cloud. To interoperate with applications on the cloud, a more standards based solution is required.
A related concept and benefit is federated identity. Organizations can agree to a common name to refer to users. The user and his attributes needs to be created only in once place and others can refer to this information.
In this blog, we briefly examine two popular protocols that can be used for single sign on on the cloud: SAML and OpenId.
OpenId
The problem OpenId solves is that you as a user do not have to maintain and provide a password to each and every site you visit.
You maintain your password or other identifying credential with one provider known as the OpenId provider.
The website or application that you visit and that requires proof of who you are, relies on the OpenId provider to verify that you are who you claim to be. This is known as the relying party.
The basics of the OpenId protocol are:
1. You visit a web application (relying party) and enter an OpenId
2. Based on your OpenId, the relying party determines who your OpenId provider is.
3. The relying party redirects your request to the OpenId provider.
4. If you are already authenticated, this step is skipped.
The OpenId provider authenticates you by asking for a password or other information. The provider warns you that the relying party is requesting information about you.
5. The request is redirected back to the relying party where you are shown the URL you were trying to access.
The protocol does not require providers or relying parties to be registered anywhere. It uses plain HTTP requests and responses. The protocol messages are plain text key value pairs. The protocol works well with modern "Web20" AJAX style applications.
The OpenId protocol originated from consumer oriented websites such as Google, Twitter, Facebook etc and that is where this protocol is popular.
The OpenId specification is described at OpenId specification
There is a java implementation of OpenId at openid4java
SAML (Security Assertion Markup Language)
SAML is a XML based protocol that enables web based authentication, authorization and single sign on.
SAML involves a relying party requesting an assertion and a SAML provider responding with the assertion.
Examples of assertions are :
Authentication Assertion : This user was authenticated using such and such method at time t.
Attribute Assertion : This user has a title supermanager.
Authorization Assertion : This user has permission to delete file xyz.doc.
A typical SAML interaction would be as follows:
1. A user tries to access a URL or a web application which is the relying party
2. The relying party creates a SAML authentication request.
3. The relying party redirects the users browser to a SAML provider. Embedded in the request is the SAML authentication request.
4. The SAML provider evaluates the SAML request and authenticates the user.
5. The SAML provides returns a SAML authentication response to the user browser.
6. The browser forwards the SAML response back to the relying party.
7. The relying party verifies and interprets the SAML response.
8. If the response implies successful authentication, the user is redirected to the URL, he was originally trying to reach.
SAML has the concept of profiles. The interaction is different based on the profile. The interaction above is the Web SSO profile.
SAML has its origins more in enterprise software, in web services, in B2B communication and is from the early 2000s when XML was very popular. In fact SAML1.x had only a SOAP binding.
The SAML specification is at SAML Specification
There is a SAML implementation at OpenSAML
Which protocol should I use ?
OpenId is a simpler protocol. But has SAML has more features.
OpenId supports discovery of the OpenId provider. Using SAML has generally required expensive SAML projects.
OpenId supports only service provider initiated SSO. You go to a service provider web site and they need authentication. They start the conversation with the OpenId provider. SAML can also support identity provider initiated SSO. You are authenticated into your companys portal. Your company has a partner travel website for business travel. With SAML, you can go from your companys portal ( SAML provider) to the partner website ( relying party) without needing reauthentication.
SAML has been around longer than OpenId. SAML is more popular in the enterprise where as OpenId is more popular in consumer oriented applications.
Both OpenId and SAML rely on external transport layer security protocols such as SSL for the security of protocol messages.
If you are starting a new website and want to accept users from other popular sites such as google or twitter, you might consider OpenId. However if you are an enterprise and you want your authenticated users to access your partner sites without re-authentication, you might need SAML.
In summary, SAML is a feature rich protocol more popular in the enterprise. OpenId is simpler protocol with some limitations.
Sunday, December 18, 2011
Saturday, November 19, 2011
What is NoSQL ?
NoSQL is a term used to refer to a class of database systems that differ from the traditional relational database management systems (RDBMS) in many ways. RDBMSs are accessed using SQL. Hence the term NoSQL implies not accessed by SQL. More specifically not RDBMS or more accurately not relational.
Some key characteristics of NqSQL databases are :
To understand what non relational means, it might be useful to recap what relational means.
Theoretically, relational databases comply with Codds 12 rules of relational model. More simply, in RDBMS, a table is relation and database has a set of such relations. A table has rows and columns. Each table has contraints and the database enforces the constraints to ensure the integrity of data.Each row in a table is identified by a primary key and tables are related using foreign keys. You eliminate duplicate data during the process of normalization, by moving columns into separate tables but keeping the relation using foreign keys. To get data out of multiple tables requires joining the tables using the foreign keys. This relational model has been useful in modeling most real world problems and is in widespread use for the last 20 years.
In addition, RDBMS vendors have gone to great lengths to ensure that RDBMSs do a great job in maintaining ACID (actomic, consistent, integrity, durable) transactional properties for the data stored. Recovery is supported from unexpected failures. This has lead to relational databases becoming the de facto standard for storing enterprise data.
If RDBMSs are so good, Why does any one need NoSQL databases ?
Even the largest enterprises have users only in the order of 1000s and data requirements in the order of few terra bytes. But when your application is on the internet, where you are dealing with millions of users and data in the order of petabytes, things start to slow down with a RDBMS. The basic operations with any database are read and write. Reads can be scaled by replicating data to multiple machines and load balancing read requests. However this does not work for writes because data consistency needs to be maintained. Writes can be scaled only by partitioning the data. But this affects read as distributed joins can be slow and hard to implement. Additionally, to maintain ACID properties, databases need to lock data at the cost of performance.
The Googles, facebooks , Twitters have found that relaxing the constraints of RDBMSs and distributing data gives them better performance for usecases that involve
What are the NoSQL solutions out there ?
There are a few different types.
1. Key Value Stores
They allow clients to read and write values using a key. Amazon's Dynamo is an example of a key value store.
get(key) returns an object or list of objects
put(key,object) store the object as a blob
Dynamo use hashing to partition data across hosts that store the data. To ensure high availability, each write is replicated across several hosts. Hosts are equal and there is no master. The advantage of Dynamo is that the key value model is simple and it is highly available for writes.
2. Document stores
The key value pairs that make up the data are encapsulated as a document. Apache CouchDB is an example of a document store. In CouchDB , documents have fields. Each field has a key and value. A document could be
3. Column based stores
Read and write is done using columns rather than rows. The best known examples are Google's BigTable and the likes of HBase and Cassandra that were inspired by BigTable. The BigTable paper says that BigTable is a sparse, distributed, persistent, multidimensional sorted Map. While that sentence seems complicated, reading each word individually gives clarity.
sparse - some cells can be empty
distributed - data is partitioned across many hosts
persistent - stored to disk
multidimensional - more than 1 dimension
Map - key and value
sorted - maps are generally not sorted but this one is
This sample might help you visualize a BigTable map
Do I needs a NoSQL store ?
You do not need a NoSQL store if
You might want to start considering NoSQL stores if
Bottomline is that NoSql stores are a new and complex technology. There are many choices and no standards. There are specific use cases for which NoSql is a good fit. But RDBMS does just fine for most vanilla use cases.
Some key characteristics of NqSQL databases are :
- They are distributed, can scale horizontally and can handle data volumes of the order of several terrabytes or petabytes, with low latency.
- They have less rigid schemas than a traditional RDBMS.
- They have weaker transactional guarantees.
- As suggested by the name, these databases do not support SQL.
- Many NoSQL databases model data as row with column families, key value pairs or documents
To understand what non relational means, it might be useful to recap what relational means.
Theoretically, relational databases comply with Codds 12 rules of relational model. More simply, in RDBMS, a table is relation and database has a set of such relations. A table has rows and columns. Each table has contraints and the database enforces the constraints to ensure the integrity of data.Each row in a table is identified by a primary key and tables are related using foreign keys. You eliminate duplicate data during the process of normalization, by moving columns into separate tables but keeping the relation using foreign keys. To get data out of multiple tables requires joining the tables using the foreign keys. This relational model has been useful in modeling most real world problems and is in widespread use for the last 20 years.
In addition, RDBMS vendors have gone to great lengths to ensure that RDBMSs do a great job in maintaining ACID (actomic, consistent, integrity, durable) transactional properties for the data stored. Recovery is supported from unexpected failures. This has lead to relational databases becoming the de facto standard for storing enterprise data.
If RDBMSs are so good, Why does any one need NoSQL databases ?
Even the largest enterprises have users only in the order of 1000s and data requirements in the order of few terra bytes. But when your application is on the internet, where you are dealing with millions of users and data in the order of petabytes, things start to slow down with a RDBMS. The basic operations with any database are read and write. Reads can be scaled by replicating data to multiple machines and load balancing read requests. However this does not work for writes because data consistency needs to be maintained. Writes can be scaled only by partitioning the data. But this affects read as distributed joins can be slow and hard to implement. Additionally, to maintain ACID properties, databases need to lock data at the cost of performance.
The Googles, facebooks , Twitters have found that relaxing the constraints of RDBMSs and distributing data gives them better performance for usecases that involve
- Large datasets of the order of petabytes. Typically this needs to stored using multiple machines.
- The application does a lot of writes.
- Reads require low latency.
- Data is semi structured.
- You need to be able to scale without hitting a bottleneck.
- Application knows what it is looking for. Adhoc queries are not required.
What are the NoSQL solutions out there ?
There are a few different types.
1. Key Value Stores
They allow clients to read and write values using a key. Amazon's Dynamo is an example of a key value store.
get(key) returns an object or list of objects
put(key,object) store the object as a blob
Dynamo use hashing to partition data across hosts that store the data. To ensure high availability, each write is replicated across several hosts. Hosts are equal and there is no master. The advantage of Dynamo is that the key value model is simple and it is highly available for writes.
2. Document stores
The key value pairs that make up the data are encapsulated as a document. Apache CouchDB is an example of a document store. In CouchDB , documents have fields. Each field has a key and value. A document could be
"firstname " : " John ",
"lastname " : "Doe" ,
"street " : "1 main st",
"city " : "New york"
In CouchDB, distribution and replication is peer to peer. Client interface is RESTful HTTP, that integrated well with existing HTTP loadbalancing solutions.
3. Column based stores
Read and write is done using columns rather than rows. The best known examples are Google's BigTable and the likes of HBase and Cassandra that were inspired by BigTable. The BigTable paper says that BigTable is a sparse, distributed, persistent, multidimensional sorted Map. While that sentence seems complicated, reading each word individually gives clarity.
sparse - some cells can be empty
distributed - data is partitioned across many hosts
persistent - stored to disk
multidimensional - more than 1 dimension
Map - key and value
sorted - maps are generally not sorted but this one is
This sample might help you visualize a BigTable map
{
row1:{
    user:{
          name: john
          id : 123
    },
    post: {
          title:This is a post
          text : xyxyxyxx
    }
}
row2:{
    user:{
          name: joe
          id : 124
    },
    post: {
          title:This is a post
          text : xyxyxyxx
    }
}
row3:{
    user:{
          name: jill
          id : 125
    },
    post: {
          title:This is a post
          text : xyxyxyxx
    }
}

}
The outermost keys row1,row2, row3 are analogues to rows. user and post are what are called column families. The column family user has columns name and id. post has columns title and text. Columnfamily:column is how you refer to a column. For eg user:id or post:text. In Hbase, when you create the table, the column families need to be specified. But columns can be added on the fly. HBase provides high availability and scalability using a master slave architecture.Do I needs a NoSQL store ?
You do not need a NoSQL store if
- All your data fits into 1 machine and does not need to be partitioned.
- You are doing OLTP which required the ACID transaction properties and data consistency that RDBMSs are good at.
- You need ad hoc querying using a language like SQL.
- You have complicated relationships between the entities in your applications.
- Decoupling data from application is important to you.
You might want to start considering NoSQL stores if
- Your data has grown so large that it can no longer be handled without partitioning.
- Your RDBMS can no longer handle the load.
- You need very high write performance and low latency reads.
- Your data is not very structured.
- You can have no single point of failure.
- You can tolerate some data inconsistency.
Bottomline is that NoSql stores are a new and complex technology. There are many choices and no standards. There are specific use cases for which NoSql is a good fit. But RDBMS does just fine for most vanilla use cases.
Tuesday, October 18, 2011
Apache Shiro : Application Security Made Easy
Considering that JAVA is over 10+ years old, the number of choices for application developers that need to build authentication and authorization into their applications is shockingly low.
In JAVA & J2EE, the JAAS specification was an attempt to address security. While JAAS works for authentication, the authorization part is just too cumbersome to use. The EJB and Servlet specifications offer coarse grained authorization at a method and resource level. But these are too coarse to be of any use in real world applications. For Spring users, Spring Security is an alternative. But it is a little complicated to use, especially the authorization model. A majority of applications end up building their home grown solutions for authentication and authorization.
Apache Shiro is a open source JAVA security framework that addresses this problem. It is an elegant framework that lets you add authentication, authorization and session management to your application with ease.
The highlights of Shiro are:
It is a pure java framework. It works with all kinds of JAVA applications: J2SE, J2EE, Web, standalone or distributed.
It can integrate easily with various repositories that may host user and permissions metadata such as RDBMs, LDAPs.
It has a simple and intuitive permissions model that can apply to wide variety of problem domains. It is a model that lets you focus on your problem domain without getting you bogged down in the framework.
It has built in support for session management.
It has built in support for caching metadata.
It integrates very easily with Spring. Same applies to any J2EE application server.
Most importantly, it is very easy to use. Most of the time, all you will need to do to integrate Shiro, will be to implement a REALM that ties Shiro to your User and Permissions metadata.
Shiro Concepts
The SecurityManager encapsulates the security configuration of an application that uses Shiro.
Subject is the runtimes view of a user that is using the system. When the subject is created, it is not authenticated. For authentication, the login method must be called, passing in the proper credentials.
Session represents the session associated with an authenticated Subject. The session has a session id. Applications can store arbitrary data in the session. The session is valid until the user logs out or the session times out.
A permission represents what actions a subject may perform on a resource in the application. Out of the box Shiro supports permissions represented by colon separated tokens. Each token has some logical meaning. For example, my application may define a permission as ResourceType:actions:ResourceInstance. More concretely File:read:contacts.doc represents a permission to read a file contacts.doc. The permission must be associated with a user, to grant that permission to the user.
A Role is a collection of permissions that might represent ability to perform some organizational function. Roles make the association between users and permissions more manageable.
A Realm abstracts your user, permission and role metadata for Shiro. You make this data available to Shiro by implementing a realm and plugging it into Shiro. Typical realms use either a relational database or LDAP to store user data.
Tutorial
Let us build a simple java application that does some authentication and authorization. For this tutorial you will need:
(1) Apache Shiro
(2) A java development environment. I use Eclipse. But you can use other IDEs or command line tools as well.
(3) You may download the source code for this example at simpleshiro.zip
Step 1: Create a Shiro.ini configuration file
We will use the default file base realm that comes with Shiro. This reads the user/permission metadata from the shiro.ini file. In a subsequent tutorial, I will show how to build a realm that gets data from a relational database.
In the Ini file, let us define some users and associate some roles to them.
# Simple shiro.ini file
[users]
# user admin with password 123456 and role Administrator
admin = 123456, Administrator
# user mike with password abcdef and role Reader
mike = abcdef, Reader
# user joe with password !23abC2 and role Writer
joe = !23abC2, Writer
# -----------------------------------------------------------------------------
# Roles with assigned permissions
[roles]
# A permission is modeled as Resourcetype:actions:resourceinstances
# Administrator has permission to do all actions on all resources
Administrator = *:*:*
# Reader has permission to read all files
Reader = File:read:*
# Writer role has permission to read and write all files
Writer = File:read,write:*
In the above shiro.ini we have defined 3 users and 3 roles. The permission is modeled
as colon separated tokens. Each token can have multiple comma separated parts. Each domain and part grants permission to some application specific domain.
Step 2: BootStrap shiro into you application
Step 3: Login
Step 4: Check if the user has permission
Step 5: Logout
The logout method logs the user out.
To get familiar with Shiro, try changing the UsernamePasswordToken and login as a different user. Check some other permissions. Modify the Shiro.ini file to create new users and roles with different permissions. Run the program a few times with different metadata and different input.
In a production environment, you will not want users and roles in an ini file. You want them in a secure repository like a relational database or LDAP. In the next part, I will show you how to build a Shiro Realm that can use user,role, permission metadata from a relational database.
In JAVA & J2EE, the JAAS specification was an attempt to address security. While JAAS works for authentication, the authorization part is just too cumbersome to use. The EJB and Servlet specifications offer coarse grained authorization at a method and resource level. But these are too coarse to be of any use in real world applications. For Spring users, Spring Security is an alternative. But it is a little complicated to use, especially the authorization model. A majority of applications end up building their home grown solutions for authentication and authorization.
Apache Shiro is a open source JAVA security framework that addresses this problem. It is an elegant framework that lets you add authentication, authorization and session management to your application with ease.
The highlights of Shiro are:
It is a pure java framework. It works with all kinds of JAVA applications: J2SE, J2EE, Web, standalone or distributed.
It can integrate easily with various repositories that may host user and permissions metadata such as RDBMs, LDAPs.
It has a simple and intuitive permissions model that can apply to wide variety of problem domains. It is a model that lets you focus on your problem domain without getting you bogged down in the framework.
It has built in support for session management.
It has built in support for caching metadata.
It integrates very easily with Spring. Same applies to any J2EE application server.
Most importantly, it is very easy to use. Most of the time, all you will need to do to integrate Shiro, will be to implement a REALM that ties Shiro to your User and Permissions metadata.
Shiro Concepts
The SecurityManager encapsulates the security configuration of an application that uses Shiro.
Subject is the runtimes view of a user that is using the system. When the subject is created, it is not authenticated. For authentication, the login method must be called, passing in the proper credentials.
Session represents the session associated with an authenticated Subject. The session has a session id. Applications can store arbitrary data in the session. The session is valid until the user logs out or the session times out.
A permission represents what actions a subject may perform on a resource in the application. Out of the box Shiro supports permissions represented by colon separated tokens. Each token has some logical meaning. For example, my application may define a permission as ResourceType:actions:ResourceInstance. More concretely File:read:contacts.doc represents a permission to read a file contacts.doc. The permission must be associated with a user, to grant that permission to the user.
A Role is a collection of permissions that might represent ability to perform some organizational function. Roles make the association between users and permissions more manageable.
A Realm abstracts your user, permission and role metadata for Shiro. You make this data available to Shiro by implementing a realm and plugging it into Shiro. Typical realms use either a relational database or LDAP to store user data.
Tutorial
Let us build a simple java application that does some authentication and authorization. For this tutorial you will need:
(1) Apache Shiro
(2) A java development environment. I use Eclipse. But you can use other IDEs or command line tools as well.
(3) You may download the source code for this example at simpleshiro.zip
Step 1: Create a Shiro.ini configuration file
We will use the default file base realm that comes with Shiro. This reads the user/permission metadata from the shiro.ini file. In a subsequent tutorial, I will show how to build a realm that gets data from a relational database.
In the Ini file, let us define some users and associate some roles to them.
# Simple shiro.ini file
[users]
# user admin with password 123456 and role Administrator
admin = 123456, Administrator
# user mike with password abcdef and role Reader
mike = abcdef, Reader
# user joe with password !23abC2 and role Writer
joe = !23abC2, Writer
# -----------------------------------------------------------------------------
# Roles with assigned permissions
[roles]
# A permission is modeled as Resourcetype:actions:resourceinstances
# Administrator has permission to do all actions on all resources
Administrator = *:*:*
# Reader has permission to read all files
Reader = File:read:*
# Writer role has permission to read and write all files
Writer = File:read,write:*
In the above shiro.ini we have defined 3 users and 3 roles. The permission is modeled
as colon separated tokens. Each token can have multiple comma separated parts. Each domain and part grants permission to some application specific domain.
Step 2: BootStrap shiro into you application
FactoryIniSecurityManagerFactory loads the configuration from shiro.ini and creates a singleton SecurityManager for the application. For simplicity, Our shiro.ini goes with the default SecurityManager configuration which uses a Text based realm and gets user,permission,role metadata from the shiro.ini file.factory = new IniSecurityManagerFactory("classpath:shiro.ini"); SecurityManager securityManager = factory.getInstance(); SecurityUtils.setSecurityManager(securityManager);
Step 3: Login
Subject usr = SecurityUtils.getSubject();
UsernamePasswordToken token = new UsernamePasswordToken("mike", "abcdef");
try {
    usr.login(token);
}
catch (AuthenticationException ae) {
    log.error(ae.toString()) ;
    return ;
}
log.info("User [" + usr.getPrincipal() + "] logged in successfully.");
SecurityUtils is a factory class for getting an existing subject or creating a new one. Credentials are passed in using an AuthenticationToken. In this case, we want to pass in a username and password and hence use the UsernamePasswordToken. Then we call the login method on the Subject passing in the authentication token.Step 4: Check if the user has permission
if (usr.isPermitted("File:write:xyz.doc")) {
    log.info(usr.getPrincipal() + " has permission to write xyz.doc ");
} else {
    log.info(usr.getPrincipal() + " does not have permission to write xyz.doc ");
}
if (usr.isPermitted("File:read:xyz.doc")) {
    log.info(usr.getPrincipal() + " has permission to read xyz.doc ");
} else {
    log.info(usr.getPrincipal() + " does not have permission to read xyz.doc ");
}
Subject has a isPermitted method that takes a permission string as parameter and returns true/false. Step 5: Logout
usr.logout() ;
The logout method logs the user out.
To get familiar with Shiro, try changing the UsernamePasswordToken and login as a different user. Check some other permissions. Modify the Shiro.ini file to create new users and roles with different permissions. Run the program a few times with different metadata and different input.
In a production environment, you will not want users and roles in an ini file. You want them in a secure repository like a relational database or LDAP. In the next part, I will show you how to build a Shiro Realm that can use user,role, permission metadata from a relational database.
Saturday, September 10, 2011
Spring and Declarative Transactions
A transaction is a unit of work that has ACID (atomic, consistent, isolated and durable) properties. Atomic means that the changes all happen or nothing happens. If money is debited from an account and credited to another account, a transaction ensures that either both the debit and credit complete or neither completes. Consistent implies that the changes leave the data in a consistent state. Isolated implies that changes do not interfere with other changes. Durable implies that once the changes are committed, they stay committed.
Resource managers such as relation databases provide a transaction manager and an API to control transactions. Those familiar with JDBC will know that by default a transaction is started because of the setting autocommit= true. Every statement that changes the database is automatically committed. This behavior can be changed by setting autocommit to false. Now the programmer must explicitly begin a transaction and then commit or rollback the transaction.
Transactions that deal with just one resource such as one database are known as local transactions. Transactions that span multiple resources such as more than one database or a database and a messaging engine are called global transactions. Global transaction are implemented using the XA protocol which involves a two phase commit. The JTA specification describes a java API for programmers to work with global transactions. The transaction methods in JDBC such as begin, commit, rollback work only with JDBC and relational databases, where as JTA can work with any transactional resource.
The code involved in working with transactions, however is boiler plate code that can be handled by a framework. At the start of the method, you need to begin a transaction and when the method completes, you need to either commit or rollback the transaction. If you have worked with EJBs, you might be familiar that you can specify in the deployment descriptor, the transactional environment in which the method should execute. For example you might say RequiresNew, which means start a new transaction before invoking the method. The container starts a new transaction before the method is invoked and commits it when the method returns. The programmer does not need to write any java code to handle transaction.
In rest of the article, we discuss with an example, declarative transaction management with Spring.
For this tutorial you will need:
(1) Spring 3.0
(2) Eclipse is optional. I use eclipse as my IDE. Eclipse lets you export the war that can be deployed to Tomcat. But you can use other IDEs or command line tools as well.
(3) You may download the source code for this example at springjdbcwithTransaction.zip .
We resuse the example from the JDBC with Spring blog we wrote some time ago. Let us add transactions support to MemberSpringJDBCDAO. This class has the insertMember method that inserts a member to the database. Let us modify the method a little bit to throw a RuntimeException after the insert into the database. The runtime exception is added to pretend that an error occured in business logic while updating the database.
In this method, would you expect the insert to be committed to the database ? The answer is Yes, though that is not the desirable behavior. The default behaviour of JDBC is autocommit = true , which means, each insert or update is committed immediately. You could set autocommit = false and explicitly commit or rollback at the end of the method. But it is much easier to let your container handle this.
To add declarative transaction management to the above method
Step 1: Define a transaction manager in springjdbcdao.xml
<bean id="txManager" class="org.springframework.jdbc.datasource.DataSourceTransactionManager"/>
Spring works with the transaction manager to begin and complete transactions.
Step 2: Turn on support for transaction annotations
Add to springjdbcdao.xml
<tx:annotation-driven transaction-manager="txManager"/>
Step 3: Add the @Transactional annotation to the insertMember method
@Transactional can take properties but we will go with default values which are:
Propagation : Required
Required means a transaction is required. If there is no transaction, Spring requests the transaction manager to start one. The other possible values is Requires_New, which tells the transaction manager to always suspend the existing transaction and start a new one.
Isolation level : Default
Use the default isolation level of the underlying resource manager.
Rollback : Any runtime exception triggers a rollback
Step 4: Run the updated insertMember method using Junit test MemberSpringJDBCDAOTest.
You will see the following logs from the transaction manager indicating the transaction rolled back.
org.springframework.jdbc.datasource.DataSourceTransactionManager - Initiating transaction rollback
2501 [main] DEBUG org.springframework.jdbc.datasource.DataSourceTransactionManager - Initiating transaction rollback
2501 [main] DEBUG org.springframework.jdbc.datasource.DataSourceTransactionManager - Rolling back JDBC transaction on Connection [org.apache.derby.impl.jdbc.EmbedConnection40@13320911 (XID = 2827), (SESSIONID = 1), (DATABASE = c:\manoj\mjprojects\database\pumausers), (DRDAID = null) ]
2501 [main] DEBUG org.springframework.jdbc.datasource.DataSourceTransactionManager - Rolling back JDBC transaction on Connection [org.apache.derby.impl.jdbc.EmbedConnection40@13320911 (XID = 2827), (SESSIONID = 1), (DATABASE = c:\manoj\mjprojects\database\pumausers), (DRDAID = null) ]
2511
Use SQL to check the database table. Confirm that no record is added.
Step 5: Remove the runtimeexception from the insertMember method and run the test again.
The Spring debug log with show that the transaction is committed. Use SQL to check the database table. Confirm that a record is added to the table.
In summary, Transactions are necessary to maintain ACID properties for data sources. Declarative transactions using Spring makes that task easier.
Resource managers such as relation databases provide a transaction manager and an API to control transactions. Those familiar with JDBC will know that by default a transaction is started because of the setting autocommit= true. Every statement that changes the database is automatically committed. This behavior can be changed by setting autocommit to false. Now the programmer must explicitly begin a transaction and then commit or rollback the transaction.
Transactions that deal with just one resource such as one database are known as local transactions. Transactions that span multiple resources such as more than one database or a database and a messaging engine are called global transactions. Global transaction are implemented using the XA protocol which involves a two phase commit. The JTA specification describes a java API for programmers to work with global transactions. The transaction methods in JDBC such as begin, commit, rollback work only with JDBC and relational databases, where as JTA can work with any transactional resource.
The code involved in working with transactions, however is boiler plate code that can be handled by a framework. At the start of the method, you need to begin a transaction and when the method completes, you need to either commit or rollback the transaction. If you have worked with EJBs, you might be familiar that you can specify in the deployment descriptor, the transactional environment in which the method should execute. For example you might say RequiresNew, which means start a new transaction before invoking the method. The container starts a new transaction before the method is invoked and commits it when the method returns. The programmer does not need to write any java code to handle transaction.
In rest of the article, we discuss with an example, declarative transaction management with Spring.
For this tutorial you will need:
(1) Spring 3.0
(2) Eclipse is optional. I use eclipse as my IDE. Eclipse lets you export the war that can be deployed to Tomcat. But you can use other IDEs or command line tools as well.
(3) You may download the source code for this example at springjdbcwithTransaction.zip .
We resuse the example from the JDBC with Spring blog we wrote some time ago. Let us add transactions support to MemberSpringJDBCDAO. This class has the insertMember method that inserts a member to the database. Let us modify the method a little bit to throw a RuntimeException after the insert into the database. The runtime exception is added to pretend that an error occured in business logic while updating the database.
public int insertMember(Member member) {
    JdbcTemplate jt = getJdbcTemplate() ;
    Object[] params = new Object[{member.getFirstname(),
        member.getLastname(),
        member.getStreet(),member.getCity(),
        member.getZip(),member.getEmail(),member.getPassword()} ;

    int ret = jt.update(insert_sql, params) ;
    throw new RuntimeException("simulate Error condition') ;
    return ret ;
}
In this method, would you expect the insert to be committed to the database ? The answer is Yes, though that is not the desirable behavior. The default behaviour of JDBC is autocommit = true , which means, each insert or update is committed immediately. You could set autocommit = false and explicitly commit or rollback at the end of the method. But it is much easier to let your container handle this.
To add declarative transaction management to the above method
Step 1: Define a transaction manager in springjdbcdao.xml
<bean id="txManager" class="org.springframework.jdbc.datasource.DataSourceTransactionManager"/>
Spring works with the transaction manager to begin and complete transactions.
Step 2: Turn on support for transaction annotations
Add to springjdbcdao.xml
<tx:annotation-driven transaction-manager="txManager"/>
Step 3: Add the @Transactional annotation to the insertMember method
@Transactional
public int insertMember(Member member) {
@Transactional can take properties but we will go with default values which are:
Propagation : Required
Required means a transaction is required. If there is no transaction, Spring requests the transaction manager to start one. The other possible values is Requires_New, which tells the transaction manager to always suspend the existing transaction and start a new one.
Isolation level : Default
Use the default isolation level of the underlying resource manager.
Rollback : Any runtime exception triggers a rollback
Step 4: Run the updated insertMember method using Junit test MemberSpringJDBCDAOTest.
You will see the following logs from the transaction manager indicating the transaction rolled back.
org.springframework.jdbc.datasource.DataSourceTransactionManager - Initiating transaction rollback
2501 [main] DEBUG org.springframework.jdbc.datasource.DataSourceTransactionManager - Initiating transaction rollback
2501 [main] DEBUG org.springframework.jdbc.datasource.DataSourceTransactionManager - Rolling back JDBC transaction on Connection [org.apache.derby.impl.jdbc.EmbedConnection40@13320911 (XID = 2827), (SESSIONID = 1), (DATABASE = c:\manoj\mjprojects\database\pumausers), (DRDAID = null) ]
2501 [main] DEBUG org.springframework.jdbc.datasource.DataSourceTransactionManager - Rolling back JDBC transaction on Connection [org.apache.derby.impl.jdbc.EmbedConnection40@13320911 (XID = 2827), (SESSIONID = 1), (DATABASE = c:\manoj\mjprojects\database\pumausers), (DRDAID = null) ]
2511
Use SQL to check the database table. Confirm that no record is added.
Step 5: Remove the runtimeexception from the insertMember method and run the test again.
The Spring debug log with show that the transaction is committed. Use SQL to check the database table. Confirm that a record is added to the table.
In summary, Transactions are necessary to maintain ACID properties for data sources. Declarative transactions using Spring makes that task easier.
Sunday, July 24, 2011
Handling completion of concurrent tasks
In the last blog on Java Executors I introduced Executors which have been the preferred way of writing multi-threaded programs in java since JDK5. In this blog we explain java.util.concurrent.Future, which helps in processing the results from concurrent task.
Prior to java.util.concurrent, if you wanted to wait for a task to complete and get some result from the task after it completed, you had to implement the wait/notify mechanism.
Up to JDK5, the interface used to model concurrent tasks was the Runnable, which has a run method. A major limitation of the run method is that it cannot return a result or throw a checked exception.
JDK5 introduced interface Callable to model concurrent tasks. The call method returns a result and can throw a checked exception.
The interface Future provides methods to check if the task is completed and to retrieve the result.
In the previous blog we discussed the ExecutorService to execute tasks and we did this by calling the execute method passing it a runnable. The ExecutorService also has a submit method that take a Callable as a parameter and returns a Future.
Future submit(Callable task) ;
The sample below brings it all together:
In the above example there are 2 threads. The thread that calls the method downloadandProcess. This thread kicks of another task (thread) in line 12 to download a file. The task is defined as a Callable in lines 6-11.In line 16 the calling thread will block until a result is available from the download thread.
Using Executor, Callable & Future is thus much simpler than using java.lang.Thread and the wait/notify mechanism.
Prior to java.util.concurrent, if you wanted to wait for a task to complete and get some result from the task after it completed, you had to implement the wait/notify mechanism.
Up to JDK5, the interface used to model concurrent tasks was the Runnable, which has a run method. A major limitation of the run method is that it cannot return a result or throw a checked exception.
JDK5 introduced interface Callable to model concurrent tasks. The call method returns a result and can throw a checked exception.
public interface Callable {
    V call() throws Exception ;
}
How to get the result returned by call() ?The interface Future provides methods to check if the task is completed and to retrieve the result.
public interface FutureYou call one of the get methods on Future to get the result. But how do you create or get a handle to a Future and how is it related to the concurrent task which might be a Callable ?{ boolean cancel(boolean interupt) ; boolean isCancelled() ; boolean isDone() ; V get() throws ....... V get(long timeout, TimeUnit unit) throws ....... }
In the previous blog we discussed the ExecutorService to execute tasks and we did this by calling the execute method passing it a runnable. The ExecutorService also has a submit method that take a Callable as a parameter and returns a Future.
The sample below brings it all together:
1 public class FileHandler {
2  private static final ExecutorService tp=Executors.newFixedThreadPool(50);
3
4  public void downloadandProcess(FileMetaData fdata) throws IOException {
5       final String filepath = fdata.getfilePath() ;
6       Callable<File> task = new Callable() {
7       public File call() {
9          File result = download(filepath) ;
10          return result ;
11      }
12      Future future = tp.submit(task) ;
13      //wait for the file to be downloaded
14
15      try {
16        File f = future.get() ;
17        process(f) ;
19      } catch (InterruptedException e) {
20        Thread.currentThread().interrupt() ;
21        future.cancel(true) ;
22      }
23  }
In the above example there are 2 threads. The thread that calls the method downloadandProcess. This thread kicks of another task (thread) in line 12 to download a file. The task is defined as a Callable in lines 6-11.In line 16 the calling thread will block until a result is available from the download thread.
Using Executor, Callable & Future is thus much simpler than using java.lang.Thread and the wait/notify mechanism.
Sunday, June 5, 2011
Java Executors
The old way of creating threads in Java was to extend the java.lang.Thread class or to implement the java.lang.Runnable interface and pass it to Thread as argument. In this approach, the task is modeled as a Runnable and you create one or more threads for each task. There were no built in facilities to re-use threads such as thread pools. Additionally, once a task was started, there was no easy way to know when the task completed without implementing the wait/notify mechanism.
Since JDK5, another abstraction for concurrent execution of tasks is the Executor interface.
With the executor framework, the submission and execution is decoupled by using the Executors class to create different kinds of Executor's that can execute the runnable.
The ExecutorService interface extends Executor and provides additional methods that lets callers submit tasks for concurrent execution.
While one can implement Executor or ExecutorService and delegate to Thread to do the actual work, that is generally not the recommended way.
java.util.concurrent.Executors is a class with factory methods to create concrete implementations of ExecutorService. This includes flexible thread pool based implementations. Using thread pools for concurrent execution has the advantage that it lets your application scale.
public static ExecutorService newFixedThreadPool(int nThreads) creates a thread pool that created threads upto the size nThreads. After that it created additional threads only if one of the existing thread dies.
public static ExecutorService newCachedThreadPool() created a threadpool with no upper bound on the number of threads. It will create threads as needed but can reuse existing threads.
public static ExecutorService newSingleThreadExecutor() creates a single thread. If the existing one dies, it will create a new one. But you will never have more that one thread.
public static ScheduledExecutorService newScheduledThreadPool(int corePoolSize) lets you create a thread pool that can be scheduled to execute periodically.
Let us write a simple concurrent server using fixed thread pool.
The advantages of using Executors are:
Today, if you needed a data structure such as a list or a Map, you use the classes in the collection framework java.util.*. Similarly for concurrent programming, you should use the executor framework in java.concurrent.* as it gives you lot of function that you would otherwise have to code yourself.
Since JDK5, another abstraction for concurrent execution of tasks is the Executor interface.
public interface Executor {
   void execute(Runnable cmd) ;
}
The task to be executed is coded by implementating the Runnable interface, similar to the older model. However in the old model, execution is typically hard coded by extending the java.lang.Thread class. With the executor framework, the submission and execution is decoupled by using the Executors class to create different kinds of Executor's that can execute the runnable.
The ExecutorService interface extends Executor and provides additional methods that lets callers submit tasks for concurrent execution.
While one can implement Executor or ExecutorService and delegate to Thread to do the actual work, that is generally not the recommended way.
java.util.concurrent.Executors is a class with factory methods to create concrete implementations of ExecutorService. This includes flexible thread pool based implementations. Using thread pools for concurrent execution has the advantage that it lets your application scale.
public static ExecutorService newFixedThreadPool(int nThreads) creates a thread pool that created threads upto the size nThreads. After that it created additional threads only if one of the existing thread dies.
public static ExecutorService newCachedThreadPool() created a threadpool with no upper bound on the number of threads. It will create threads as needed but can reuse existing threads.
public static ExecutorService newSingleThreadExecutor() creates a single thread. If the existing one dies, it will create a new one. But you will never have more that one thread.
public static ScheduledExecutorService newScheduledThreadPool(int corePoolSize) lets you create a thread pool that can be scheduled to execute periodically.
Let us write a simple concurrent server using fixed thread pool.
1 public class WebServer {
2  private final ExecutorService tpool = Executors.newFixedThreadPool(50) ;
3
4  public void start() throws IOException {
5    ServerSocket socket = new ServerSocket(8080) ;
6    while(!tpool.isShutdown()) {
7        try {
8           Socket c = socket.accept() ;
9           tpool.execute(new Runnable() {
10               public void run() { process(c) ; }
11           }
12        } catch(Exception e) {
13           log("Error occured .." + e) ;
14        }
15    }
16  }
17  private void process(socket c) {
18    // service the request
19  }
20  public void stop() {
21    tpool.shutdown() ;
22  }
23}
In line 2 we create an ExecutorService. In lines 9-11 we create a runnable for each task and submit it for execution. The shutdown call in line 21 is a graceful shutdown. Tasks that are already submitted will be completed and no new tasks are accepted.The advantages of using Executors are:
   Decoupling of task creation with submission/excecution.
   Built in thread pools.
   Built in orderly shutdown.
   Built in scheduling. (mentioned above but not discussed)
   Ability to check or block on completion of tasks.
Today, if you needed a data structure such as a list or a Map, you use the classes in the collection framework java.util.*. Similarly for concurrent programming, you should use the executor framework in java.concurrent.* as it gives you lot of function that you would otherwise have to code yourself.
Sunday, May 8, 2011
What is MapReduce ?
MapReduce is a parallel programming technique made popular by Google. It is used for processing very very large amounts of data. Such processing can be completed in a reasonable amount of time only by distributing the work to multiple machines in parallel. Each machine processes a small subset of the data. MapReduce is a programming model that lets developers focus on the writing code that processes their data without having to worry about the details of parallel execution.
MapReduce requires modeling the data to be processed as key,value pairs. The developer codes a map function and a reduce function.
The MapReduce runtime calls the map function for each key,value pair. The map function takes as input a key,value pair and produces an output which is another key,value pair.
The MapReduce runtime sorts and groups the output from the map functions by key. It then calls the reduce function passing it a key and a list of values associated with the key. The reduce function is called for each key. The output from the reduce function is a key,value pair. The value is generally an aggregate or something calculated by processing the list of values that were passed in for the input key. The reduce function is called for each intermediate key produced by the map function. The output from the reduce function is the required result.
As an example , let us say you have a large number of log files that contain audit logs for some event such as access to an account. You need to find out how many times each account was accessed in the last 10 years.
Assume each line in the log file is a audit record. We are processing log files line by line.The map and reduce functions would look like this:
MapReduce jobs are generally executed on a cluster of machines. Each machine executes a task which is either a map task or reduce task. Each task is processing a subset of the data. In the above example, let us say we start with a set of large input files. The MapReduce runtime breaks the input data into partitions called splits or shards. Each split or shard is processed by a map task on a machine. The output from each map task is sorted and partitioned by key. The outputs from all the maps are merged to create partitions that are input to the reduce tasks.
There can be multiple machines each running a reduce task. Each reduce task gets a partition to process. The partition can have multiple keys. But all the data for each key is in 1 partition. In other words each key can processed by 1 reduce task only.
The number of machines , the number of map tasks , number of reduce tasks and several other things are configurable.
MapReduce is useful for problems that require some processing of large data sets. The algorithm can be broken into map and reduce functions. MapReduce runtime takes care of distributing the processing to multiple machines and aggregating the results.
Apache Hadoop is an open source Java implementation of mapreduce. Stay tuned for future blog / tutorial on mapreduce using hadoop.
MapReduce requires modeling the data to be processed as key,value pairs. The developer codes a map function and a reduce function.
The MapReduce runtime calls the map function for each key,value pair. The map function takes as input a key,value pair and produces an output which is another key,value pair.
The MapReduce runtime sorts and groups the output from the map functions by key. It then calls the reduce function passing it a key and a list of values associated with the key. The reduce function is called for each key. The output from the reduce function is a key,value pair. The value is generally an aggregate or something calculated by processing the list of values that were passed in for the input key. The reduce function is called for each intermediate key produced by the map function. The output from the reduce function is the required result.
As an example , let us say you have a large number of log files that contain audit logs for some event such as access to an account. You need to find out how many times each account was accessed in the last 10 years.
Assume each line in the log file is a audit record. We are processing log files line by line.The map and reduce functions would look like this:
map(key , value) {

    // key = byte offset in log file
    // value = a line in the log file
    if ( value is an account access audit log) {
        account number = parse account from value
        output key = account number, value = 1
    }
}
reduce(key, list of values) {
    // key = account number
    // list of values {1,1,1,1.....}
    for each value
       count = count + value

    output key , count
}
The map function is called for each line in each log file. Lines that are not relevant are ignored. Account number is parsed out of relevant lines and output with a value 1. The MapReduce runtime sorts and groups the output by account number. The reduce function is called for each account. The reduce function aggregates the values for each account, which is the required result.MapReduce jobs are generally executed on a cluster of machines. Each machine executes a task which is either a map task or reduce task. Each task is processing a subset of the data. In the above example, let us say we start with a set of large input files. The MapReduce runtime breaks the input data into partitions called splits or shards. Each split or shard is processed by a map task on a machine. The output from each map task is sorted and partitioned by key. The outputs from all the maps are merged to create partitions that are input to the reduce tasks.
There can be multiple machines each running a reduce task. Each reduce task gets a partition to process. The partition can have multiple keys. But all the data for each key is in 1 partition. In other words each key can processed by 1 reduce task only.
The number of machines , the number of map tasks , number of reduce tasks and several other things are configurable.
MapReduce is useful for problems that require some processing of large data sets. The algorithm can be broken into map and reduce functions. MapReduce runtime takes care of distributing the processing to multiple machines and aggregating the results.
Apache Hadoop is an open source Java implementation of mapreduce. Stay tuned for future blog / tutorial on mapreduce using hadoop.
Sunday, April 10, 2011
Spring Security Tutorial #1 - Authentication and Authorization
Spring security is a framework that lets you add security to spring based applications. Before Spring security, developers had to rely on J2EE security to secure java applications. J2EE provides very limited function. You could secure web resources or EJB methods. But there is nothing more. Additional drawback of J2EE security is that implementations are application server specific. If you do anything more that what is in the servlet or EJB specification, it is not portable.
In addition to basic authentication and authorization, Spring Security has support for:
Remember me authentication
Session management
ACL based security
Integration with CAS, LDAP, Open ID
and many other things.
It is not possible to cover all those topics in one article. I plan to write about Spring Security as a series of tutorials. This first installment #1 will get you started with Spring Security and help you setup basic authentication and authorization.
Authentication refers to ensuring that the user is who he or she claims to be. Any application that has any security will typically force the user to present a name and a password. If they match what is stored in the system, we say the user is authenticated and allow the user to continue using the application.
Authorization refers to ensuring that an authenticated user has the necessary permissions to perform some operation or access some data. Authorization involves checking a pre-defined policy which may say that these users have permission to perform these actions on this resource.
For this tutorial, let us take the simple web application we developed in Spring MVC blog and add security to it. Springmvc.zip was renamed to Springsecurityv1 and security metadata added. You can download the sample at Springsecurityv1.zip.
For this tutorial you will also need
(1) Spring 3.0
(2) Spring Security 3.x.
(3) Eclipse is optional. I use eclipse as my IDE. But you can use other IDEs or command line tools as well.
(4) A webserver like Tomcat
(5) Some familiarity with the Spring framework.
Note that Spring Security is packaged separately and is not included in core Spring.
Step 1:
As always, spring configuration begins in applicationcontext config file. We start by adding the namespace which has the spring configuration elements. In springsecurity-servlet.xml, the security namespace http://www.springframework.org/schema/security is added.
Step 2:
Add the Spring security filters to the web.xml. These filters intercept requests and force authentication and authorization
Step 3:
Add a minimal Spring security configuration to springsecurity-servlet.xml.
The http element is the element under which all web application related security configuration. The intercept-url says that for any request to any url ( pattern = "/*") , the user needs to be authenticated and a member of the role ROLE_manager.
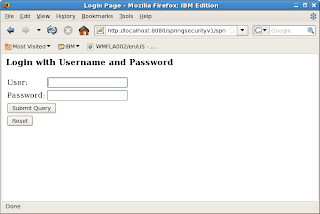
When you try to access any URL in this application, Spring will redirect you to a page where you need to enter a username and password. The login page is generated by Spring.
But who are the valid users ? And which of them are part of role ROLE_manager.
Step 4:
A really simple way is to define the users in springsecurity-servlet.xml using the authentication-provider
element.
In this authentication provider, 2 users tony and raul are defined in the configuration. Tony has the authority ROLE_manager.
For a production application, You will want define users, password and roles in database (or LDAP). see step 7 for database configuration.
Step 5:
From eclipse, export the war file (or use the provided war file).
Deploy the war file to tomcat.
Point your browser to http://localhost:8080/springsecurityv1/test.htm. You will be shown the login screen below.
Type in user tony and password tony12. Login will be successful and you will be served the web page below

Step 6:
Restart the browser. Clear cookies and sessions. Type the same URL.
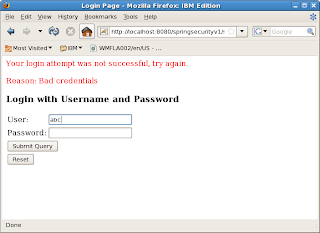
You will be prompted for username/pwd. This time type in abc / abc12. The login will fail as abc is not a valid user.
Repeat with user raul /raul12. With raul the login succeeds. But access will be denied because raul does not have the ROLE_manager authority.
Step 7:
As mentioned earlier, you would normally not keep username/passwords in the spring configuration file. Spring provides the jdbc-user-service that lets you authenticate with users defined in a database.
In this app, springsecurity2-servlet.xml is second configuration that uses jdbc-user-service. The configuration is
For this to work, you need to create database tables required by Spring. See Spring documentation for database table schema.
In summary, getting started with Spring Security is quite easy. In a few simple steps, by adding some configuration metadata, we have enabled authentication and authorization for our web application.
In addition to basic authentication and authorization, Spring Security has support for:
Remember me authentication
Session management
ACL based security
Integration with CAS, LDAP, Open ID
and many other things.
It is not possible to cover all those topics in one article. I plan to write about Spring Security as a series of tutorials. This first installment #1 will get you started with Spring Security and help you setup basic authentication and authorization.
Authentication refers to ensuring that the user is who he or she claims to be. Any application that has any security will typically force the user to present a name and a password. If they match what is stored in the system, we say the user is authenticated and allow the user to continue using the application.
Authorization refers to ensuring that an authenticated user has the necessary permissions to perform some operation or access some data. Authorization involves checking a pre-defined policy which may say that these users have permission to perform these actions on this resource.
For this tutorial, let us take the simple web application we developed in Spring MVC blog and add security to it. Springmvc.zip was renamed to Springsecurityv1 and security metadata added. You can download the sample at Springsecurityv1.zip.
For this tutorial you will also need
(1) Spring 3.0
(2) Spring Security 3.x.
(3) Eclipse is optional. I use eclipse as my IDE. But you can use other IDEs or command line tools as well.
(4) A webserver like Tomcat
(5) Some familiarity with the Spring framework.
Note that Spring Security is packaged separately and is not included in core Spring.
Step 1:
As always, spring configuration begins in applicationcontext config file. We start by adding the namespace which has the spring configuration elements. In springsecurity-servlet.xml, the security namespace http://www.springframework.org/schema/security is added.
<beans xmlns:security="http://www.springframework.org/schema/security"
       xmlns:xsi="http://www.w3.org/2001/XMLSchema-instance"
       xmlns="http://www.springframework.org/schema/beans"
       xsi:schemalocation="http://www.springframework.org/schema/beans
       http://www.springframework.org/schema/beans/spring-beans-2.0.xsd
       http://www.springframework.org/schema/security
       http://www.springframework.org/schema/security/spring-security-3.0.3.xsd">
</beans>
Step 2:
Add the Spring security filters to the web.xml. These filters intercept requests and force authentication and authorization
<filter>
    <filter-name>springSecurityFilterChain</filter-name>
    <filter-class>org.springframework.web.filter.DelegatingFilterProxy</filter-class>
</filter>
<filter-mapping>
    <filter-name>springSecurityFilterChain</filter-name>
    <url-pattern>/*</url-pattern>
</filter-mapping>
Step 3:
Add a minimal Spring security configuration to springsecurity-servlet.xml.
<security:http auto-config="true">
    <security:intercept-url access="ROLE_manager" pattern="/**">
</security:intercept-url>
</security:http>
The http element is the element under which all web application related security configuration. The intercept-url says that for any request to any url ( pattern = "/*") , the user needs to be authenticated and a member of the role ROLE_manager.
When you try to access any URL in this application, Spring will redirect you to a page where you need to enter a username and password. The login page is generated by Spring.
But who are the valid users ? And which of them are part of role ROLE_manager.
Step 4:
A really simple way is to define the users in springsecurity-servlet.xml using the authentication-provider
element.
<security:authentication-manager>
    <security:authentication-provider>
      <security:user-service>
        <security:user authorities="ROLE_manager" name="tony" password="tony12">
        <security:user authorities="" name="raul" password="raul12">
        </security:user>
      </security:user>
    </security:user-service>
  </security:authentication-provider>
</security:authentication-manager>
In this authentication provider, 2 users tony and raul are defined in the configuration. Tony has the authority ROLE_manager.
For a production application, You will want define users, password and roles in database (or LDAP). see step 7 for database configuration.
Step 5:
From eclipse, export the war file (or use the provided war file).
Deploy the war file to tomcat.
Point your browser to http://localhost:8080/springsecurityv1/test.htm. You will be shown the login screen below.

Type in user tony and password tony12. Login will be successful and you will be served the web page below

Step 6:
Restart the browser. Clear cookies and sessions. Type the same URL.
You will be prompted for username/pwd. This time type in abc / abc12. The login will fail as abc is not a valid user.

Repeat with user raul /raul12. With raul the login succeeds. But access will be denied because raul does not have the ROLE_manager authority.
Step 7:
As mentioned earlier, you would normally not keep username/passwords in the spring configuration file. Spring provides the jdbc-user-service that lets you authenticate with users defined in a database.
In this app, springsecurity2-servlet.xml is second configuration that uses jdbc-user-service. The configuration is
<security:authentication-manager>
    <security:authentication-provider>
      <security:jdbc-user-service data-source-ref="securityDataSource"/>
    </security:authentication-provider>
  </security:authentication-manager>

   <bean id="securityDataSource"
       class="org.springframework.jdbc.datasource.DriverManagerDataSource">
       <property name="driverClassName" value="org.apache.derby.jdbc.EmbeddedDriver" />
       <property name="url" value="jdbc:derby:/home/mks/mkprojects/database/springusers" />
   </bean>
For this to work, you need to create database tables required by Spring. See Spring documentation for database table schema.
In summary, getting started with Spring Security is quite easy. In a few simple steps, by adding some configuration metadata, we have enabled authentication and authorization for our web application.
Sunday, March 6, 2011
When to use the Java volatile keyword ?
In the Java programming world, there is some misunderstanding around the volatile keyword. Most programmers never use it and you rarely see code that has it. In this article I try to remove the mystery surrounding volatile.
Section 8.3.1.4 of the Java language specification has this definition: A field may be declared volatile, in which case the Java memory model (§17) ensures that all threads see a consistent value for the variable.
Consider the class below:
At time time1, thread t1 calls SomeValue.setvalue(3).
At time time2, thread t2 calls SomeValue.getValue().
Thanks to the java memory model, there is no guarantee that thread t2 see the value 3.
One way to fix the problem is the make the methods getValue and setValue synchronized. Declaring the member variable value volatile is another way to do the same.
So which approach is better ? To answer the question, there are 2 concepts that need to be examined.
1. Locking:
With synchronized, locking is involved. To execute code within a synchronized block, a lock must first be acquired. The lock is held until the block is exit. If another thread tries to execute the same code block, it will block until it can acquire the lock.
With volatile, no locking is involved. Whenever possible, avoiding locking is better because locking can make the application less scalable.
2. Atomicity:
An atomic operation is one that is indivisible.
setX is an atomic operation. Every thread that calls setX concurrently can setX and expect it to behave correctly. Timing does not affect the result.
But consider the method
It really consists of 3 operations: get the value, add x to it, store the value.
If two threads call increase, the result depends on timing.
Let us say at time1 , value is 3
At time2, thread t1 calls increase(4). It sees the current value at 3. But before it can update the value,
At time3, thread t2 calls increase(5). It sees the current value as 3 as well.
At time4, thread t1 updates the value to 3+4 = 7.
At time5, thread t2 updates the value to 3+5 = 8. This is known as a race condition. Depending on timing of event, you can get different results.
Synchronization makes the code within the synchronized block atomic. If you make the method synchronized,
the increase method is atomic. Only one thread is able to increase the value at a time. When the method completes, every other thread will see the value. With synchronized, in the above example, the final value would be 3+4+5 which is 12 which is correct.
By just declaring value as volatile, this atomicity is not there. It two threads call increase at the same time, we cannot predict what the result is.
Back to the question we started with. When to use volatile ?
The volatile keyword can help when you know that your access to the field whether read or write is atomic. The benefit of volatile is that the changes to the field are published to other threads without the use of locking. When you are sure that operations are atomic, declaring a field as volatile is simpler that wrapping code in synchronized blocks.
An additional point to remember is that volatile is not necessary for fields that immutable or declared final. The Java memory model guarantees that final fields are visible to other threads without synchronization or volatile.
The classic use case of volatile is a boolean flag that is used to stop a long running thread.
If one thread calls stopTask, the main thread can immediately see the value and stop. stopTask is atomic.
However when you have operations that are non atomic such as the increase method, you need synchronization. JDK5 introduced atomic variable classes such AtomicInteger, AtomicLong etc in the package java.util.concurrent.atomic. These classes extend the volatile concept to compound operations such as read-modify-write. These can be used in place of volatile. A more detailed discussion of atomic classes is topic for another blog.
Section 8.3.1.4 of the Java language specification has this definition: A field may be declared volatile, in which case the Java memory model (§17) ensures that all threads see a consistent value for the variable.
Consider the class below:
public class SomeValue {
    private static long value = 0  ;
    public static void setValue(int i) {
        value = i ;
    }
    public static void getValue() {
        return i ;
    }
}
At time time1, thread t1 calls SomeValue.setvalue(3).
At time time2, thread t2 calls SomeValue.getValue().
Thanks to the java memory model, there is no guarantee that thread t2 see the value 3.
One way to fix the problem is the make the methods getValue and setValue synchronized. Declaring the member variable value volatile is another way to do the same.
So which approach is better ? To answer the question, there are 2 concepts that need to be examined.
1. Locking:
With synchronized, locking is involved. To execute code within a synchronized block, a lock must first be acquired. The lock is held until the block is exit. If another thread tries to execute the same code block, it will block until it can acquire the lock.
With volatile, no locking is involved. Whenever possible, avoiding locking is better because locking can make the application less scalable.
2. Atomicity:
An atomic operation is one that is indivisible.
public void setX(boolean val) {
    x = val ;
}
setX is an atomic operation. Every thread that calls setX concurrently can setX and expect it to behave correctly. Timing does not affect the result.
But consider the method
public void increase(long x) {
    value = value + x ;
}
It really consists of 3 operations: get the value, add x to it, store the value.
If two threads call increase, the result depends on timing.
Let us say at time1 , value is 3
At time2, thread t1 calls increase(4). It sees the current value at 3. But before it can update the value,
At time3, thread t2 calls increase(5). It sees the current value as 3 as well.
At time4, thread t1 updates the value to 3+4 = 7.
At time5, thread t2 updates the value to 3+5 = 8. This is known as a race condition. Depending on timing of event, you can get different results.
Synchronization makes the code within the synchronized block atomic. If you make the method synchronized,
public synchronized void increase(long x) {
    value = value + x ;
}
the increase method is atomic. Only one thread is able to increase the value at a time. When the method completes, every other thread will see the value. With synchronized, in the above example, the final value would be 3+4+5 which is 12 which is correct.
By just declaring value as volatile, this atomicity is not there. It two threads call increase at the same time, we cannot predict what the result is.
Back to the question we started with. When to use volatile ?
The volatile keyword can help when you know that your access to the field whether read or write is atomic. The benefit of volatile is that the changes to the field are published to other threads without the use of locking. When you are sure that operations are atomic, declaring a field as volatile is simpler that wrapping code in synchronized blocks.
An additional point to remember is that volatile is not necessary for fields that immutable or declared final. The Java memory model guarantees that final fields are visible to other threads without synchronization or volatile.
The classic use case of volatile is a boolean flag that is used to stop a long running thread.
public class LongRunningTask extend Thread {
    private volatile boolean stop = false ;
    public void run() {
       while(!stop) {
         doWork() ;
       }
    }
    public void stopTask() {
       stop = true ;
    }
}
If one thread calls stopTask, the main thread can immediately see the value and stop. stopTask is atomic.
However when you have operations that are non atomic such as the increase method, you need synchronization. JDK5 introduced atomic variable classes such AtomicInteger, AtomicLong etc in the package java.util.concurrent.atomic. These classes extend the volatile concept to compound operations such as read-modify-write. These can be used in place of volatile. A more detailed discussion of atomic classes is topic for another blog.
Wednesday, February 9, 2011
Spring AOP made simple
Certain types of code like logging, monitoring, security access checks, transaction boundary management etc apply to all methods in the application. These are known as cross cutting concerns. The poor programmers way of implementing cross cutting concerns is to the implement them in every method. Every method would begin with a checkAccess call, a fire call that fires a monitoring event, a call that starts a new transaction. When you implement a new method, you need to copy this common code to the new method.
Aspect oriented programming is a style and mechanism where common code factored out and is inserted before, after or around the real application code using either proxies or other techniques like code injection. Before we proceed any further, let us describe some AOP terminology.
An Aspect is a piece of common code that can be applied repeatedly to various places in the application. An example is code that may start a transaction or complete the transaction.
A join point is a point in the program, such as a method.
Advice is code that is part of the aspect and that is applied to a join point. Some different types of advice are before advice,after advice, around advice. Before advice is executed before the method. After advice is executed after the method is executed. In Around advice, part of the advice executes before the method and the other part after the method.
A pointcut is a set of join points to which advice may be applied. Generally some syntax or expression is used to match or determine the join points.
Enough threory. Let us get down to a real sample.Let us write a simple Spring application that prints a greeting. Then we will use Spring AOP to add a security check to the method by creating an Aspect with a before advice. Lastly we will add transaction support to the method by creating an Aspect with an around advice. Note that we will not be writing any real security or transaction code. The sample will just print a message where as in a real application you would have real code. You may download the complete source code at springaop.zip
For this tutorial you will also need
(1) Spring 3.0
(2) Eclipse is optional. I use eclipse as my IDE. But you can use other IDEs or command line tools as well. springaop.zip can be imported into eclipse.
(3) Some familiarity with the Spring framework.
Step 1: Code a simple Spring application
<bean id="greetbean" class="com.mj.spring.aop.NewYearGreeting"/>
Run the above application. The following line is output:
From SpringAOP::HappyNewYear
Step 2: Add @AspectJ support by adding the following line to springaop.xml. @Aspectj is a style where aspects are declared by adding annotations to java classes. This style was developed by the AspectJ project. We use these annotations in steps 3 and 4.
<aop:aspectj-autoproxy/>
Step 3: Create a security Aspect as shown below. It is an ordinary java class with the annotation @Aspect. The checkAccess method is anotated as @Before and it is a before Advice. It applies to the pointcut execution(public * com.mj.spring.aop.*.*(..)). You can find more detailed explanation of this syntax in the Spring or AspectJ documentation.But you might have guessed that it means - execute the before advice before every public method of every class in the package com.mj.spring.aop.
Step 5: Add the bean definitions for the aspects created in 3 & 4 to springaop.xml, so that the spring container knows about the aspects. This is an often forgotten step that can lead to unnecessary grief because the aspects will not get called.
<bean id="TransactionAspect" class="com.mj.spring.aop.TransactionAspect"/>
<bean id="SecurityAspect" class="com.mj.spring.aop.SecurityAspect"/>
Step 6: run the application. You will see the output:
Checking access before method invoke
Starting a transaction Before calling the method
in the method - From SpringAOP::Happy new year 2011
Commiting the transaction After calling the method
Using the techniques shown above, you can add sophisticated function to your application that is generally available only in complex containers like the EJB container or the SCA container. These containers typically use java dynamic proxies. SpringAOP is implemented using java dynamic proxies as well. But more importantly it makes it really easy to add cross cutting concerns to your application with need intrusive or repetetive code changes.
Aspect oriented programming is a style and mechanism where common code factored out and is inserted before, after or around the real application code using either proxies or other techniques like code injection. Before we proceed any further, let us describe some AOP terminology.
An Aspect is a piece of common code that can be applied repeatedly to various places in the application. An example is code that may start a transaction or complete the transaction.
A join point is a point in the program, such as a method.
Advice is code that is part of the aspect and that is applied to a join point. Some different types of advice are before advice,after advice, around advice. Before advice is executed before the method. After advice is executed after the method is executed. In Around advice, part of the advice executes before the method and the other part after the method.
A pointcut is a set of join points to which advice may be applied. Generally some syntax or expression is used to match or determine the join points.
Enough threory. Let us get down to a real sample.Let us write a simple Spring application that prints a greeting. Then we will use Spring AOP to add a security check to the method by creating an Aspect with a before advice. Lastly we will add transaction support to the method by creating an Aspect with an around advice. Note that we will not be writing any real security or transaction code. The sample will just print a message where as in a real application you would have real code. You may download the complete source code at springaop.zip
For this tutorial you will also need
(1) Spring 3.0
(2) Eclipse is optional. I use eclipse as my IDE. But you can use other IDEs or command line tools as well. springaop.zip can be imported into eclipse.
(3) Some familiarity with the Spring framework.
Step 1: Code a simple Spring application
public interface Greeting {
    public String message(String target) ;
}

public class NewYearGreeting implements Greeting {
    public String message(String target) {
        System.out.println("From SpringAOP::" + target) ;
        return target ;
    }
    public static void main(String[] args) {
        ApplicationContext context =
        new ClassPathXmlApplicationContext("springaop.xml");
        Greeting sprg = (Greeting) context.getBean("greetbean");
        sprg.message("Happy new year 2011") ;
   }
}
Add the bean definition in springaop.xml:<bean id="greetbean" class="com.mj.spring.aop.NewYearGreeting"/>
Run the above application. The following line is output:
From SpringAOP::HappyNewYear
Step 2: Add @AspectJ support by adding the following line to springaop.xml. @Aspectj is a style where aspects are declared by adding annotations to java classes. This style was developed by the AspectJ project. We use these annotations in steps 3 and 4.
<aop:aspectj-autoproxy/>
Step 3: Create a security Aspect as shown below. It is an ordinary java class with the annotation @Aspect. The checkAccess method is anotated as @Before and it is a before Advice. It applies to the pointcut execution(public * com.mj.spring.aop.*.*(..)). You can find more detailed explanation of this syntax in the Spring or AspectJ documentation.But you might have guessed that it means - execute the before advice before every public method of every class in the package com.mj.spring.aop.
@Aspect
public class SecurityAspect {
 @Before("execution(public * com.mj.spring.aop.*.*(..))")
 public boolean checkAccess() {
  System.out.println("Checking access before method invoke") ;
  return true ;
 }
}
Step 4: Create a transactions aspect as shown below. As in step 3, the class is annotated @Aspect. @Aspect
public class TransactionAspect {
@Pointcut("execution(public * com.mj.spring.aop.*.*(..))")
public void greetingmethod() {}
@Around("greetingmethod()")
public Object doTran(ProceedingJoinPoint pjp) throws Throwable {
System.out.println("Starting a transaction Before calling the method") ;
Object output = pjp.proceed();
System.out.println("Completing the transaction After calling the method") ;
return output ;
}
}
The doTran method is the method that implements the around advice. The first parameter of the method that implements the around advice has to be of type ProceedingJoinPoint, which delegates the call to the actual target. Within the method you call the target by calling the proceed method. So the transaction is started before the proceed call which leads to target method invocation. The transaction is completed after the proceed() call - that is after the target method invocation. I have also made the pointcut generic so it can be applied to other methods if necessary. To define a pointcut that can be reused, create an empty method like greetingmethod() {} and add the @pointcut annotation to it. The @Around annotation on doTran uses this pointcut.Step 5: Add the bean definitions for the aspects created in 3 & 4 to springaop.xml, so that the spring container knows about the aspects. This is an often forgotten step that can lead to unnecessary grief because the aspects will not get called.
<bean id="TransactionAspect" class="com.mj.spring.aop.TransactionAspect"/>
<bean id="SecurityAspect" class="com.mj.spring.aop.SecurityAspect"/>
Step 6: run the application. You will see the output:
Checking access before method invoke
Starting a transaction Before calling the method
in the method - From SpringAOP::Happy new year 2011
Commiting the transaction After calling the method
Using the techniques shown above, you can add sophisticated function to your application that is generally available only in complex containers like the EJB container or the SCA container. These containers typically use java dynamic proxies. SpringAOP is implemented using java dynamic proxies as well. But more importantly it makes it really easy to add cross cutting concerns to your application with need intrusive or repetetive code changes.
Sunday, January 23, 2011
Designing Java Classes For Inheritance
In Object oriented programming, inheritance is concept that lets programmers re-use code as well specialize existing code. In Java, a class, the sub class can extend another class, the super class and there by inherit the attributes and behaviour (methods) of the super class. Specializing behavior is really a related concept called polymorphism. However you cannot specialize without inheriting.
Popular belief is that inheritance is always a good thing. However when used inappropriately, it can lead to code with bugs. The problems have been well documented in several books and articles. Yet very often we come across code with a complex inheritance hierarchy that looks cute, but is difficult to use and more often than not broken. Below I recap a few key points to remember when using inheritance in Java.
Consider the class MemberStore which is used to persist Members to a database
extend the above class
Let us try to use the new class
The problem is that inheritance breaks encapsulation. Inheritance requires the programmer implementing the subclass class to know the implementation details of the super class. So generally it is safe to use inheritance only when the subclass and the superclass are under the ownership of the same programmer or team of programmers.
If you are designing your class so that other programmers may extend it, then it is preferable that the implemented methods of your class not call other overridable methods as was done by insertAll. If they do, then the javadocs must clearly document it. In the above example, the javadocs should say that insertAll calls insert. But this is not sufficient.
The javadocs for methods that can be safely overridden should say under what conditions and for what behavior the method should be overridden.
Classes that are not meant to be extended and methods that should not be overridden should be marked final so that programmers cannot extend them.
Constructors should never invoke overridable methods.
Lastly, in Java inheritance implies an "generalization/specialization" or "is a" relationship. Even if you do not intend to specialize, if you add a method to the subclass with the same signature of a method in the subclass, the method in the subclass overrides the method in the superclass. If there is no "is a" relationship, it is never a good idea to use inheritance.
The better way to add a counter to MemberStore is to write a wrapper around MemberStore that has MemberStore as a private member and delegates to it. This is otherwise known as composition.
Popular belief is that inheritance is always a good thing. However when used inappropriately, it can lead to code with bugs. The problems have been well documented in several books and articles. Yet very often we come across code with a complex inheritance hierarchy that looks cute, but is difficult to use and more often than not broken. Below I recap a few key points to remember when using inheritance in Java.
Consider the class MemberStore which is used to persist Members to a database
public class MemberStore {
  public void insert(Member m) {
    // insert into database
  }
  public void insertAll(List<member> c) {
    // insert all members into the database
    // by calling the insert(m) for each Member
    Iterator i = c.iterator() ;
    while(i.hasNext()) {
      insert((Member)c.next()) ;

    }
  }
}
Let us say there is a need for a class that not only stores Members, but also keeps count of recently stored members. The wrong way to do it would be toextend the above class
public class MemberStoreWithCounter extends MemberStore {
  private int counter = 0 ;
  public void insert(Member m) {
    counter++ ;
    super.insert(m) ;
  }
  public void insertAll(Collection<member> c) {
    counter = counter + c.size() ;
    super.insertAll(c) ;
  }
  public int getCount() {
    return counter ;
  }
}
Let us try to use the new class
List<Member> list = new ArrayList<Member>() ;
list.add(new  Member(......)) ;
List.add(new  Member(......)) ;
MemberStorewithCounter m  = new .... ;
m.insertAll(list) ;
System.out.println(a.getCount());
What do you suppose the last line prints ? You were probably expecting 2. But it will print 4. The problem is that the insertAll method is implemented by calling the insert method. So the counter is incremented twice for each Member. This is the classic wrong use of inheritance.
The problem is that inheritance breaks encapsulation. Inheritance requires the programmer implementing the subclass class to know the implementation details of the super class. So generally it is safe to use inheritance only when the subclass and the superclass are under the ownership of the same programmer or team of programmers.
If you are designing your class so that other programmers may extend it, then it is preferable that the implemented methods of your class not call other overridable methods as was done by insertAll. If they do, then the javadocs must clearly document it. In the above example, the javadocs should say that insertAll calls insert. But this is not sufficient.
The javadocs for methods that can be safely overridden should say under what conditions and for what behavior the method should be overridden.
Classes that are not meant to be extended and methods that should not be overridden should be marked final so that programmers cannot extend them.
Constructors should never invoke overridable methods.
Lastly, in Java inheritance implies an "generalization/specialization" or "is a" relationship. Even if you do not intend to specialize, if you add a method to the subclass with the same signature of a method in the subclass, the method in the subclass overrides the method in the superclass. If there is no "is a" relationship, it is never a good idea to use inheritance.
The better way to add a counter to MemberStore is to write a wrapper around MemberStore that has MemberStore as a private member and delegates to it. This is otherwise known as composition.
public class BetterMemberStoreWithCounter {
  private MemberStore ms = new MemberStore() ;
  private int count = 0 ;
  public insert(Member m) {
     ms.insert(m) ;
     count++ ;
  }
  public insertAll(Collection<member> c) {
     count = count.size() ;
     ms.insertAll(c) ;
  }

}
Subscribe to:
Posts (Atom)